")
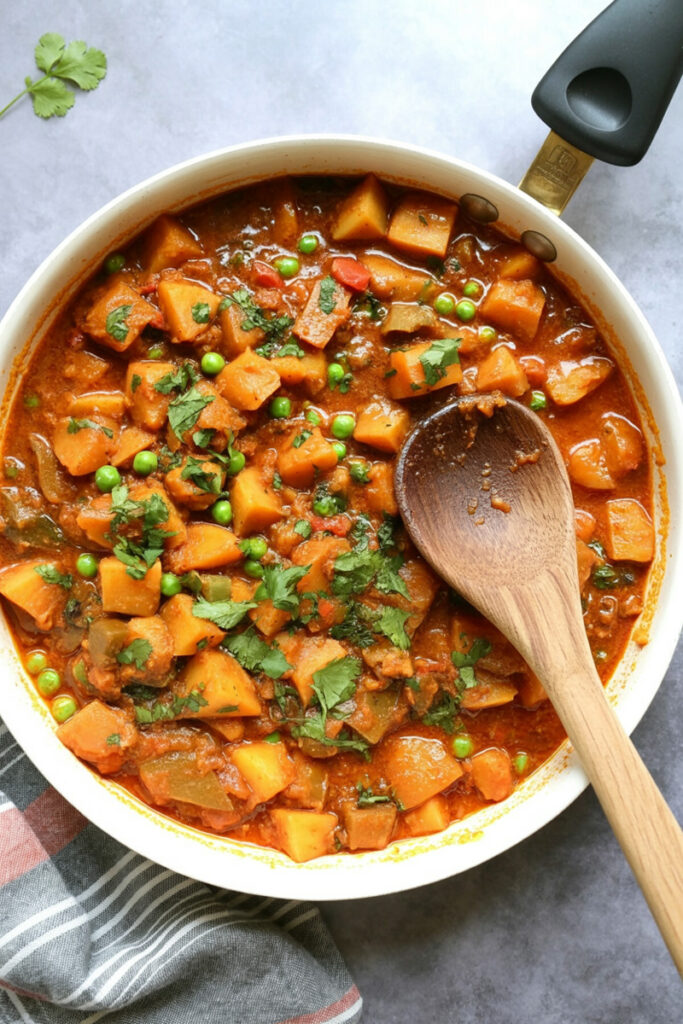
Hey there! Today, I want to share a recipe that’s basically a warm hug in a bowl: Aloo Matar.
If you’ve ever dipped your toes into North Indian food, you’ve probably heard of it. The name is super simple. Aloo means potato, and Matar means peas.1 That’s it! Together, they make a simple but incredibly tasty curry that’s a staple in so many homes.
I remember the first time I had a truly amazing Aloo Matar. It wasn’t at a fancy restaurant, but at a friend’s house, scooped straight from the pot it was cooked in. It was so comforting. This dish isn’t just food; it’s the taste of everyday life.
The cool thing about this potato and pea curry is how versatile it is. You’ll find quick versions bubbling away on a Tuesday night and richer, fancier ones served at big celebrations.
The recipe we’re making today is my favorite homestyle version. It’s fast enough for a weeknight but has a couple of little tricks—like using freshly crushed spices—that really take the flavor to the next level. This is the kind of dish that makes you feel like a pro, even if you’re new to cooking.
So, grab your apron, and let’s get started!
What to Expect
Before we jump in, here’s a quick look at what we’re getting into. This will help you get everything ready and cook without any stress.
Prep and Cook Time: This is a pretty quick meal. You’ll need about 5 minutes to prep and 30 minutes to cook. That means dinner is on the table in about 35 minutes.
Servings and Scaling: This recipe makes enough for 4 people. Need to make more or less? No problem. It scales up or down really easily.
Here’s a handy chart:
| Servings | Potatoes (Medium) | Tomatoes (Medium) | Water (cups) | Peas (cups) |
| 2 | 1-2 | 1 | 1/2 | 1/4 |
| 4 | 3 | 2 | 1 | 1/2 |
| 8 | 6 | 4 | 2 | 1 |
Difficulty Level: I’d call this Easy to Intermediate. The steps are simple. The only trick is using your nose and eyes to know when things are ready. It’s a great recipe for building confidence with Indian spices.
Equipment Needed: You don’t need anything fancy, I promise.
- A good pan with a heavy bottom (a skillet or an Indian kadai is perfect).
- A small spice grinder or a mortar and pestle. Don’t have one? No worries. A ziplock bag and a rolling pin work just as well!
- A knife and cutting board.
- A bowl for your potatoes.
Make-Ahead Tips: Want to get a head start? You totally can. You can chop the onion, garlic, ginger, and chili and keep them in an airtight container in the fridge for up to 2 days. You can even make the tomato base ahead of time and pop it in the fridge.
Let’s Grab Our Ingredients
Great food starts with great ingredients. Let’s walk through what you’ll need. Think of this as your flavor toolkit.
For this easy potato curry, our main players are 3 medium potatoes, cubed small.2 I personally love using waxy potatoes like Yukon Golds or red potatoes. They hold their shape really well and get creamy without turning into mush. Nobody wants potato mush.
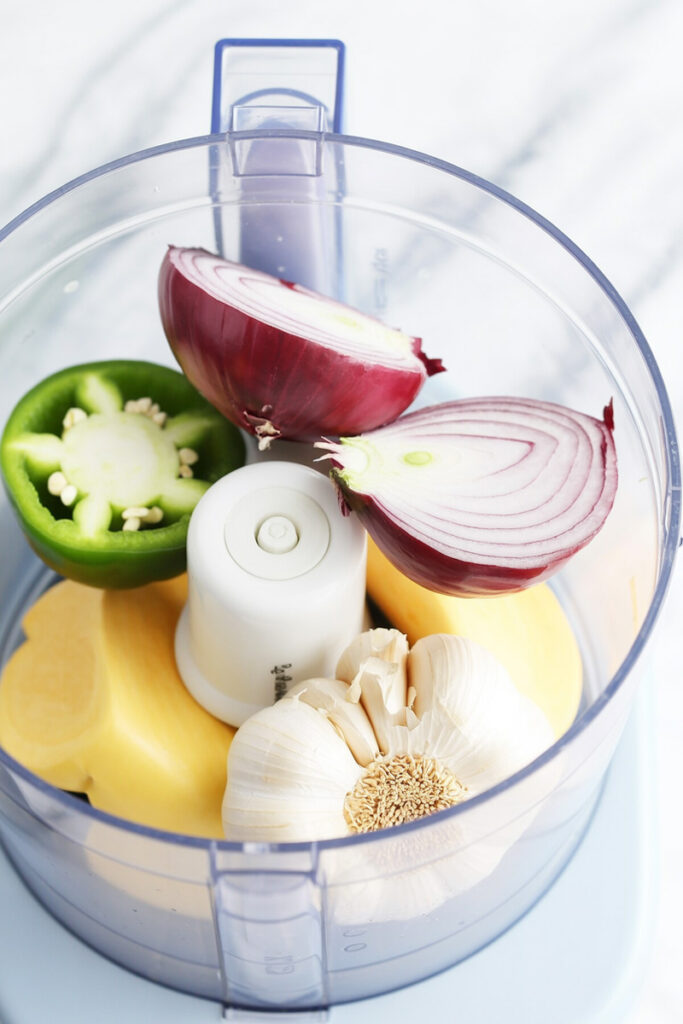
Next, we build our flavor foundation with the aromatics:
- 1/4 cup of chopped onion
- 4 cloves of finely chopped garlic
- 1 inch of finely chopped ginger
- 1/2 of a hot green chile, also finely chopped
These four create the amazing base, or masala, for our curry.
Now for the spices! The real secret here is using whole spices that we’ll crush ourselves. Why? Because crushing them right before you cook releases all their amazing oils and flavors. It’s like the difference between fresh-squeezed orange juice and the stuff from a carton. It just tastes better. You’ll need:
- 1 teaspoon of whole coriander seeds
- 1/2 teaspoon of whole cumin seeds
We’ll also add 1/2 teaspoon of turmeric for that beautiful golden color and earthy flavor, and 1/3 to 1/2 teaspoon of cayenne for a bit of warmth.
To make the gravy rich and delicious, you’ll need 2 medium to large tomatoes, pureed. Fresh tomatoes give it a bright, tangy flavor, but canned puree works fine if you’re in a hurry. We’ll also need 1/2 teaspoon of salt (you can always add more later!), 1 cup of water, and 1/2 cup of peas. Frozen peas are my go-to; just give them a quick rinse under warm water.
Finally, for that fresh burst at the end, we’ll use 1/2 cup of loosely packed chopped cilantro, but we’ll divide it.
Okay, Let’s Get Cooking!
Alright, time for the fun part. I’ll walk you through everything, step by step.
Step 1: Give the Potatoes a Head Start
First, let’s get those potatoes going. Heat one teaspoon of oil in your skillet over medium heat. When the oil shimmers a little, add your cubed potatoes. We’re not cooking them all the way through yet. We’re just searing them for about 3 to 5 minutes to get some nice golden-brown spots on the edges. This little step helps them taste better and hold their shape later on.
While the potatoes are doing their thing, go ahead and crush your cumin and coriander seeds. Get your onion, garlic, ginger, and chili all chopped and ready. Once the potatoes have some color, scoop them out into a bowl and set them aside.
Step 2: Toast Those Spices
Add the last teaspoon of oil to the same skillet and let it get hot. Now, add your freshly crushed seeds. This part is quick! They only need about 30 seconds. Your nose is your best friend here. You’ll smell a wonderfully toasty, nutty aroma. That’s called “blooming” the spices, and it’s a total flavor booster. Just be careful not to burn them—keep stirring!
Step 3: Making the Curry Base (Masala)
Right away, add your chopped onion, garlic, ginger, and green chile to the pan. Cook for about 3 minutes, stirring it all around. You’ll notice the sharp, raw smell starts to soften up, and the onions will get soft and a little see-through.
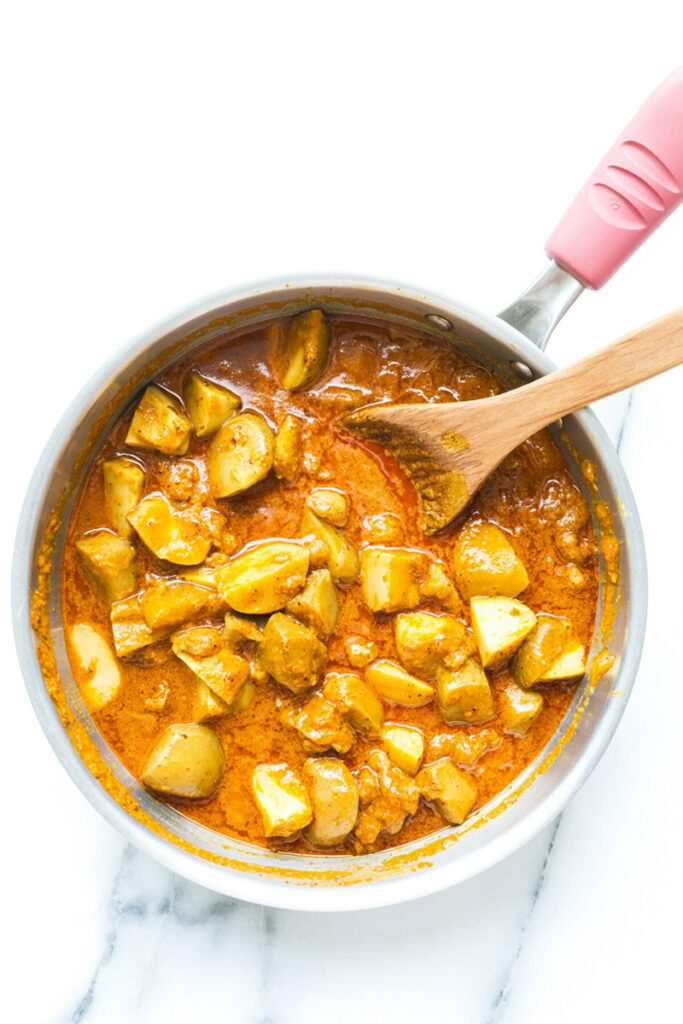
Now, add the ground spices: the turmeric and cayenne. Stir them in for another 30 seconds. This quick toast in the oil makes their flavor deeper. Next, pour in your tomato purée. Let this cook for 3 to 4 minutes. You’re looking for the mixture to get thicker and a little darker. The big signal? You’ll see little drops of oil separating from the edges. That’s how you know your base is perfect!
Step 4: Bring It All Together
Time to add the seared potatoes back into the skillet. Sprinkle in the salt and pour in the water. Give it a good stir, scraping up any tasty browned bits stuck to the bottom of the pan.
Bring everything to a gentle boil. Then, turn the heat down, cover the skillet, and let it simmer for about 15 minutes.
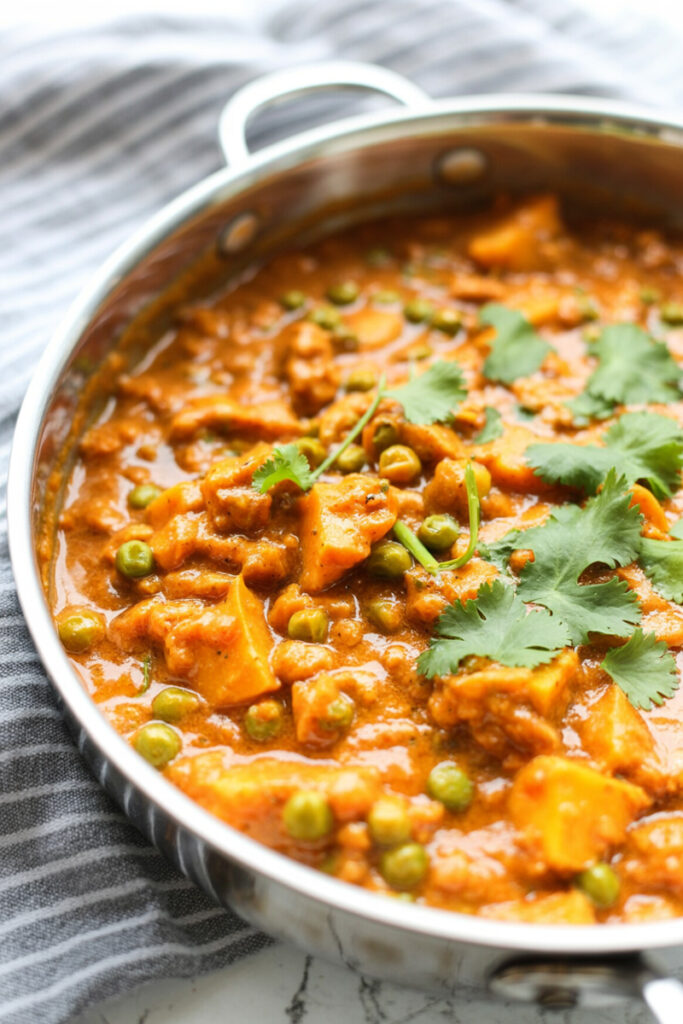
After 15 minutes, lift the lid and check the potatoes. They should be getting soft. If your curry looks a little too thick, just add a splash more water. Now, stir in the peas and half of your chopped cilantro. Cover it up again and let it cook for another 5 to 7 minutes. It’s done when the potatoes are tender enough to easily poke with a fork and the peas are bright green.
Finally, the most important part. Taste it. Does it need more salt? A little more spice? This is your chance to make it just right. For an extra touch of warmth, you can stir in a pinch of garam masala at the very end.
Make It Your Own
One of the best things about this Aloo Matar recipe is that you can easily tweak it.
- Dietary Needs? This recipe is already vegetarian and gluten-free. If you use oil instead of ghee, it’s also vegan! It’s a dish everyone can enjoy.
- Adjust the Heat. You’re in charge of the spice level. For a milder curry, skip the cayenne and use a green chili with the seeds removed. Want it spicier? Add more cayenne or keep those chili seeds in!
- Weeknight vs. Weekend. The recipe is perfect for a simple weeknight dinner. But if you have guests coming over, you can make it feel a little fancier. Just stir in a tablespoon of heavy cream or coconut cream at the end. It makes the gravy so smooth and velvety.
- Add More Veggies. Feel free to toss in other vegetables! Diced carrots or cauliflower are great additions; just add them at the same time as the potatoes. Bell peppers are nice too—add them in the last 10 minutes of cooking.
Time to Eat! (And What to Do with Leftovers)
You did it! Your kitchen smells amazing, and you’ve got a beautiful curry ready to go.
How to Serve It: Spoon a big helping into a bowl. Top it with the rest of that fresh cilantro. The vibrant green against the rich orange curry looks so good.
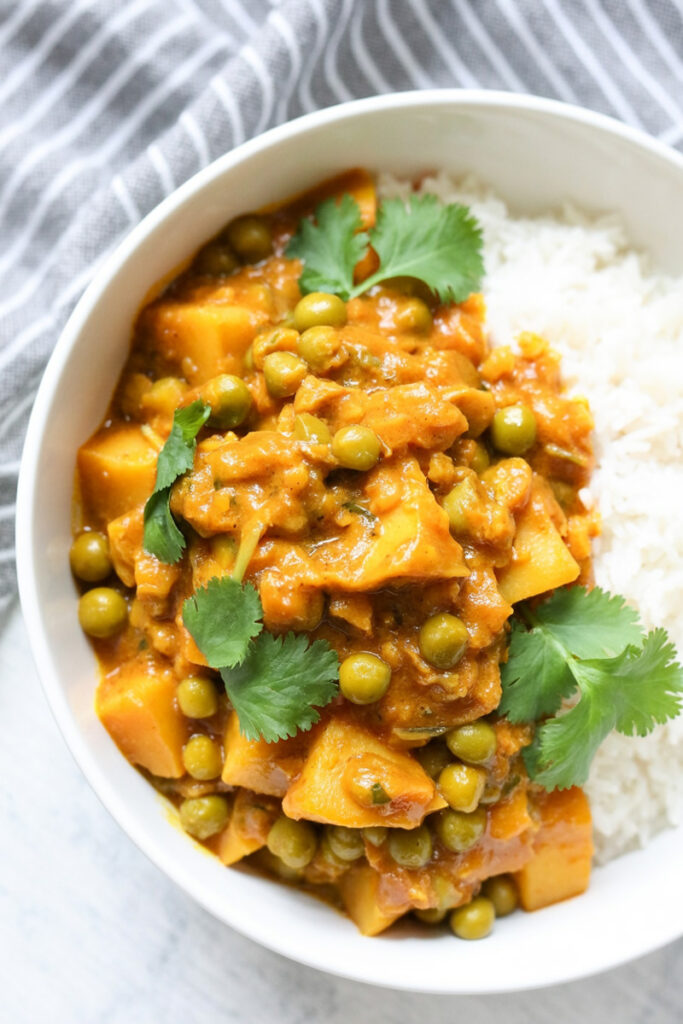
What to Serve It With: Aloo Matar is perfect with warm, fluffy flatbreads like roti or naan for scooping up all that delicious gravy.3 It’s also fantastic with simple steamed basmati rice. A side of cool cucumber raita (a yogurt dip) is also a great way to balance the warm spices.4
Storing Leftovers: The good news? It tastes even better the next day! The flavors get a chance to hang out and get to know each other. Store the curry in an airtight container in the fridge for up to 3-4 days. To reheat, just warm it up slowly on the stove. You might need to add a splash of water to loosen the gravy.
Can You Freeze It? Yep! This curry freezes pretty well. Let it cool down completely, then store it in a freezer-safe container for up to 2 months. Just a heads-up: sometimes potatoes can get a little bit of a weird texture after being frozen, but the flavor will still be awesome. Thaw it in the fridge overnight before reheating.
PrintAloo Matar (Pea & Potato Curry)

Whip up this classic North Indian potato and pea curry that feels like a warm hug in a bowl. It’s simple, packed with flavor, and perfect for a cozy weeknight dinner. My go-to recipe for a true taste of home!
- Prep Time: 5 minutes
- Cook Time: 30 minutes
- Total Time: 35 minutes
- Yield: 4 people 1x
- Category: Main Course, Curry
- Cuisine: North Indian
Ingredients
- 3 medium potatoes, cubed small
- 2 tsp oil, divided
- 1 tsp whole coriander seeds
- ½ tsp whole cumin seeds
- ¼ cup onion, chopped
- 4 cloves garlic, finely chopped
- 1-inch piece ginger, finely chopped
- ½ hot green chile, finely chopped
- ½ tsp turmeric powder
- ⅓ to ½ tsp cayenne powder
- 2 medium tomatoes, pureed
- ½ tsp salt, plus more to taste
- 1 cup water
- ½ cup frozen peas
- ½ cup fresh cilantro, chopped and divided
Instructions
- Sear the Potatoes: Heat 1 tsp of oil in a skillet over medium heat. Add the cubed potatoes and sauté for 3-5 minutes until they have light golden-brown spots. Remove them from the skillet and set aside. While they cook, crush your coriander and cumin seeds.
- Bloom the Spices: Add the remaining 1 tsp of oil to the same skillet. Add the freshly crushed seeds and toast for about 30 seconds until they smell wonderfully fragrant. Watch them closely—they can burn fast!
- Build the Flavor Base: Add the onion, garlic, ginger, and green chile. Cook for 3 minutes until the onions soften. Stir in the turmeric and cayenne for 30 seconds, then pour in the tomato purée. Cook for another 3-4 minutes until the mixture thickens and you see oil separating at the edges.
- Simmer the Curry: Return the potatoes to the skillet. Add the salt and water, stir everything together, and bring it to a boil. Once boiling, reduce the heat to low, cover the skillet, and let it simmer for 15 minutes.
- Finish and Serve: Stir in the frozen peas and half of your chopped cilantro. Cover and cook for another 5-7 minutes, or until the potatoes are tender enough to be easily pierced with a fork. Taste and add more salt if you like. Garnish with the remaining fresh cilantro and serve hot.
Notes
- Serving Suggestions: This curry is fantastic with warm naan bread, roti, or fluffy basmati rice. A side of cooling cucumber raita (yogurt dip) provides a perfect balance to the spices.
- Tips & Tricks: For the best flavor, crushing your own whole spices is key. It releases their essential oils and makes the curry taste so much fresher. If you don’t have a spice grinder, a ziplock bag and a rolling pin do the trick!
- Storage & Reheating: Leftovers are even better the next day! Store the curry in an airtight container in the refrigerator for up to 4 days. Reheat gently on the stovetop, adding a splash of water to loosen the gravy if needed.