Hello! I’m so glad you’re here. Today, we’re going to tackle one of my all-time favorite dishes: Chicken Biryani.
If you’ve ever walked into an Indian restaurant and been hit by that amazing, fragrant smell, you know what I’m talking about. That deep, spicy, comforting aroma of perfectly cooked rice and tender chicken. It’s pure magic.
Biryani isn’t just food; it’s a whole event on a plate. It has a super cool history, coming from the royal kitchens of the Mughal Empire. Back then, making it was a huge, all-day project. It involved marinating chicken for hours and using a special cooking method called “dum,” where the pot was sealed with dough to trap all the flavor inside.
But let’s be real. Who has time for that on a Tuesday night?
That’s why I’m so excited to share this recipe with you. It’s my little secret for getting that incredible, show-stopping biryani flavor without all the fuss. We’ll build those delicious layers of flavor quickly, and we’ll use a simple oven trick to get that same “dum” effect.
So, grab your apron. Your kitchen is about to smell amazing.

A Quick Look at What We’re Doing
Let’s quickly go over the plan. Knowing the steps ahead of time always makes me feel more confident in the kitchen.
How Long Will It Take?
- Prep Time: 10 minutes
- Cook Time: 45 minutes
- Resting Time: 10 minutes
- Total Time: About 1 hour, 5 minutes
How Many People Does This Feed?
This recipe makes enough for 4 people. But it’s super easy to change the amounts if you’re cooking for more or fewer people. I made a little chart to help you out.
| Servings | Basmati Rice | Chicken Stock | Water | Chicken Thighs |
| 2 | ¾ cup | ½ cup | ⅝ cup | ½ lb |
| 4 | 1 ½ cups | 1 cup | 1 ¼ cups | 1 lb |
| 6 | 2 ¼ cups | 1 ½ cups | 1 ⅞ cups | 1 ½ lbs |
| 8 | 3 cups | 2 cups | 2 ½ cups | 2 lbs |
Just remember to adjust the spice mix, too. And if you’re doubling the recipe, you’ll want to use a bigger pan!
Is It Hard to Make?
I’d call this one Intermediate. But don’t let that scare you! None of the steps are tricky on their own. It’s mostly about cooking a few different things (the rice, the chicken) and then putting them all together. Think of it like a fun puzzle. I’ll be here to walk you through it.
What You’ll Need
You don’t need any wild gadgets for this. Here’s what to pull out of your cupboards:
- A saucepan with a good lid. This is for our rice.
- A wide sauté pan or skillet. For cooking the chicken and shallots.
- An oven-safe pot or Dutch oven. This is where we’ll assemble everything and bake it. A Dutch oven is great because it holds heat really well.
- A few small bowls. For mixing spices and getting your saffron ready.
- A rice cooker (optional). I have to admit, I use my rice cooker all the time. It’s a foolproof way to get perfect rice. If you have one, go ahead and use it for the first step!
Let’s Talk Ingredients
The real secret to a great biryani is using good ingredients. Let’s break down what we’re using.
For the Rice
The rice is the foundation. It has to be fluffy and fragrant. We’re using:
- 1 ½ cups of Basmati rice. I try to get a good quality, aged basmati. Why? Because aged rice has less moisture, which means the grains cook up long and separate instead of clumping together. That’s the sign of a top-notch biryani.
- 1 ¼ cups of water and 1 cup of low-sodium chicken stock. Here’s a little trick I love. Using stock instead of just water sneaks in an extra layer of savory flavor.
- Whole spices: 3 green cardamom pods, 5 cloves, and a 2-inch piece of cinnamon bark. These guys will perfume the rice from the inside out while it cooks.
- 1 tsp of kosher salt.
For the Spice Mix
This is the heart and soul of our dish. It’s what gives biryani that signature warm, complex taste. In a small bowl, you’ll mix together:
- 1 tsp garam masala
- ½ tsp turmeric
- 2 tsp cumin powder
- 1 tsp coriander powder
- ½ tsp kasoori methi (that’s dried fenugreek leaves). Quick tip: Crush the leaves between your palms before you toss them in. This little action wakes up their unique, slightly bittersweet smell.
- 1 tsp Kashmiri chili powder. This gives the dish that beautiful restaurant color and a nice, mild heat.
- ½ tsp amchoor powder (dried mango powder). This is our secret weapon! It adds a little tang that cuts through all the richness.
For the Chicken
- 1 lb of boneless, skinless chicken thighs. I always use thighs for biryani. They have a bit more fat than breasts, which means they stay super tender and juicy. No dry chicken here! You’ll want to cut them into bite-sized pieces.
- 5 tbsp of a neutral oil, like canola.
- 1 cup of thinly sliced shallots. Shallots are like a gentler, slightly sweeter cousin to onions.
- ½ tsp of cumin seeds.
- 1 tbsp of garlic ginger paste.
- 1 tbsp of tomato paste mixed with 4 tbsp of water.
For Assembly and Garnish
These are the final touches that make the dish special.
- 1 tbsp of fried shallots. These add an amazing sweet crunch. You can buy these or make your own.
- A pinch of saffron mixed in a couple of tablespoons of warm water. This gives the rice beautiful golden streaks and that classic biryani look.
- Fresh cilantro for a final sprinkle of freshness.
The Step-by-Step Guide: Let’s Get Cooking!
Alright, ready? Let’s do this.
Step 1: Get the Rice Perfect
First thing’s first. Go ahead and preheat your oven to 350°F (175°C).
Now, let’s talk rice.
If you’re using a rice cooker, this is easy. Just put the basmati, water, chicken stock, cardamom, cloves, cinnamon, and salt in, and turn it on.
If you’re using a saucepan:
- Combine all those same ingredients in your pot.
- Bring it to a simmer over medium heat. Don’t put the lid on yet.
- Once it’s bubbling, turn the heat down to the lowest setting your stove has.
- Cover the pot with that tight-fitting lid and set a timer for 20 minutes.
- And the most important rule is… no peeking! Seriously. Let the steam do its job.
- When the timer goes off, turn off the heat but leave the pot right there on the burner, still covered, for 5 more minutes.
- Now you can take off the lid. The whole spices should be right on top, so they’re easy to pick out. Gently fluff the rice with a fork, then put the lid back on to keep it warm.
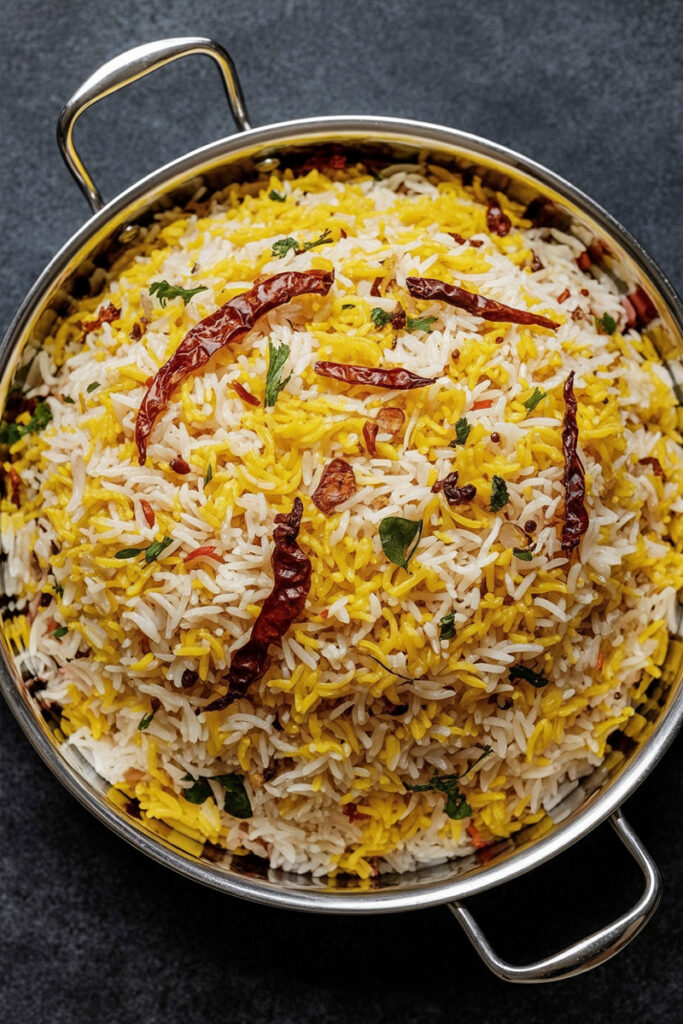
Step 2: Make the Chicken Masala
While the rice is cooking, we’ll make the chicken.
- Heat the oil in your sauté pan over medium heat. Add the sliced shallots and cook them until they’re soft and just starting to get a little golden.
- Toss in the cumin seeds. You’ll hear them sizzle, and in about 30 seconds, your kitchen will start to smell incredible.
- Now add the garlic ginger paste. Stir it around until it smells fragrant. Keep an eye on it—it can burn fast!
- Turn the heat down to medium-low. This is important. We don’t want to scorch our spices.
- Add your entire biryani spice mix and the ½ tsp of salt. Stir it constantly for about 30 seconds. You’re basically toasting the spices in the oil, which makes them taste even better. It should form a thick, fragrant paste.
- Pour in the tomato paste mixture. Turn the heat back up to medium and cook for a minute.
- Time for the chicken! Add all the chicken pieces to the pan and stir everything together so each piece is coated in that beautiful masala. Cook until the chicken is mostly cooked through (about 150°F on a thermometer). It will finish cooking in the oven.

Step 3: Put It All Together!
This is the fun part.
- Grab your oven-safe pot or Dutch oven. Spoon a little more than half of your fluffy rice into the bottom and spread it out.
- Now, pour all of the chicken and that delicious sauce right on top of the rice.
- Gently spread the rest of the rice over the chicken.
- Sprinkle the fried shallots over the top layer of rice.
- Drizzle the saffron water all over the top. Try to make little streaks and pools of color instead of pouring it in one spot. This is how you get that pretty multi-colored rice effect.
- Tear off a piece of foil and press it over the top of the pot to create a good seal. Then, put the lid on top. The foil acts like a gasket, trapping all that steam inside. This is our easy “dum” method!
- Carefully place the pot in your preheated oven and bake for 15 minutes.
- After 15 minutes, take the pot out of the oven. Let it stand, still sealed, for 10 more minutes. This resting step is crucial! It lets all the flavors hang out and get to know each other.
When you finally take off the lid and foil, get ready. You’ll be greeted by the most amazing cloud of fragrant steam.

Want to Mix It Up?
One of the best parts of cooking is making a recipe your own. Feeling creative?
- For a more traditional flavor: You can marinate the chicken for a few hours in a mix of yogurt, lemon juice, and the biryani spice mix before you cook it.
- Make it vegetarian: This recipe works great without meat! Swap the chicken for paneer, chickpeas, or a mix of veggies like carrots, peas, and cauliflower. Just use vegetable stock instead of chicken stock.
- Kick up the heat: Add a fresh green chili or two (slit lengthwise) when you add the chicken. This will add a nice, fragrant heat without being overwhelming.
How to Serve and Store Your Biryani
Time to eat! I like to spoon the biryani onto a big platter. Try not to stir it too much in the pot—you want to see all those pretty layers of white and yellow rice and the chicken masala.
Garnish with a generous handful of crispy fried shallots and some fresh, chopped cilantro.
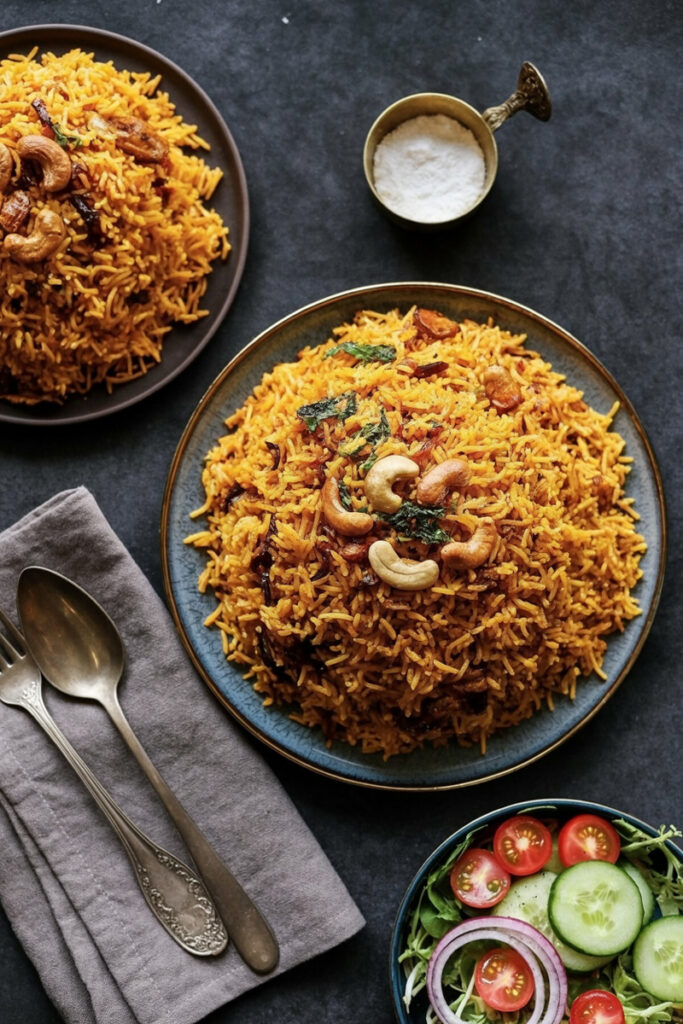
What to serve with it?
Biryani is definitely a meal in itself. But it’s perfect with a side of cool raita (a simple yogurt sauce). Just mix plain yogurt with some grated cucumber and a pinch of salt and roasted cumin powder. A simple salad with sliced onions and tomatoes is also great.
Got leftovers?
Store them in an airtight container in the fridge for up to 3 days. Honestly, sometimes it tastes even better the next day.
To reheat, the microwave is your best bet. Sprinkle a little water over the rice, cover it with a damp paper towel, and heat for 2-3 minutes. This steams the rice so it doesn’t dry out.
I really hope you love making this biryani. Happy cooking!
PrintIndian Chicken Biryani – Restaurant Style
Craving that incredible, fragrant chicken biryani from your favorite Indian restaurant? This simple, one-hour recipe delivers all the amazing, layered flavor without the all-day effort. It’s a show-stopping dish that will make your kitchen smell absolutely divine!
- Prep Time: 10 minutes
- Cook Time: 45 minutes
- Total Time: 1 hour 5 minutes (+ Resting Time)
- Yield: 4 people 1x
- Category: Main Course
- Cuisine: Indian
Ingredients
For the Rice:
- 1 ½ cups Basmati rice
- 1 cup low-sodium chicken stock
- 1 ¼ cups water
- 3 green cardamom pods
- 5 whole cloves
- 1 (2-inch) piece of cinnamon bark
- 1 tsp kosher salt
Biryani Spice Mix:
- 1 tsp garam masala
- 2 tsp cumin powder
- 1 tsp coriander powder
- ½ tsp turmeric
- ½ tsp kasoori methi (dried fenugreek leaves)
- 1 tsp Kashmiri chili powder
- ½ tsp amchoor (dried mango powder)
- ½ tsp kosher salt
For the Chicken & Assembly:
- 1 lb boneless, skinless chicken thighs, cut into bite-sized pieces
- 5 tbsp neutral oil (like canola)
- 1 cup shallots, thinly sliced
- ½ tsp cumin seeds
- 1 tbsp garlic ginger paste
- 1 tbsp tomato paste, mixed with 4 tbsp water
- 1 tbsp fried shallots
- A pinch of saffron, dissolved in 2 tbsp warm water
- Fresh cilantro, for garnish
Instructions
- Prep & Cook Rice: Preheat your oven to 350°F (175°C). In a saucepan with a tight-fitting lid, combine all rice ingredients. Bring to a simmer, then reduce heat to low, cover, and cook for 20 minutes. Turn off the heat and let it rest, still covered, for 5 more minutes. Fluff with a fork.
- Make the Chicken Masala: While the rice cooks, heat the oil in a large skillet over medium heat. Sauté the shallots until softened. Add the cumin seeds and toast for 30 seconds until fragrant, then stir in the garlic ginger paste.
- Spice it Up: Turn the heat to medium-low and add the entire Biryani Spice Mix. Stir constantly for 30 seconds to toast the spices. Pour in the diluted tomato paste and cook for 1 minute.
- Cook the Chicken: Add the chicken pieces to the skillet. Cook, stirring often, until the chicken is about 80% cooked through.
- Layer the Biryani: In an oven-safe pot or Dutch oven, spread half of the cooked rice. Top with all the chicken and its sauce. Cover with the remaining rice. Sprinkle the fried shallots over the top and drizzle with the saffron water.
- Bake & Rest: Cover the pot tightly with foil, then place the lid on top. Bake for 15 minutes. Remove from the oven and let it rest, still sealed, for 10 minutes before serving. Garnish with fresh cilantro.
Notes
- Serving Suggestions: This biryani is divine with a side of cool cucumber raita (yogurt dip) or a simple onion and tomato salad.
- Tips & Tricks: For the fluffiest, non-sticky rice, use good-quality aged Basmati. Don’t skip the final 10-minute resting period—it’s where the magic happens and all the flavors meld together!
- Storage & Reheating: Store leftovers in an airtight container in the fridge for up to 3 days. To reheat, microwave with a splash of water and cover with a damp paper towel to steam the rice perfectly.

