
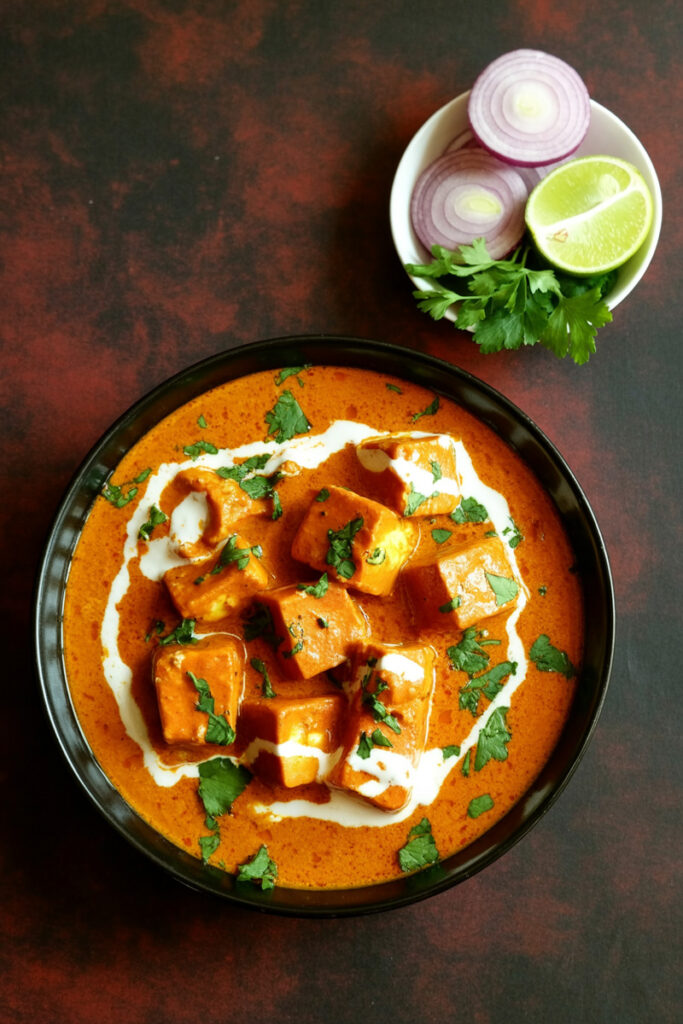
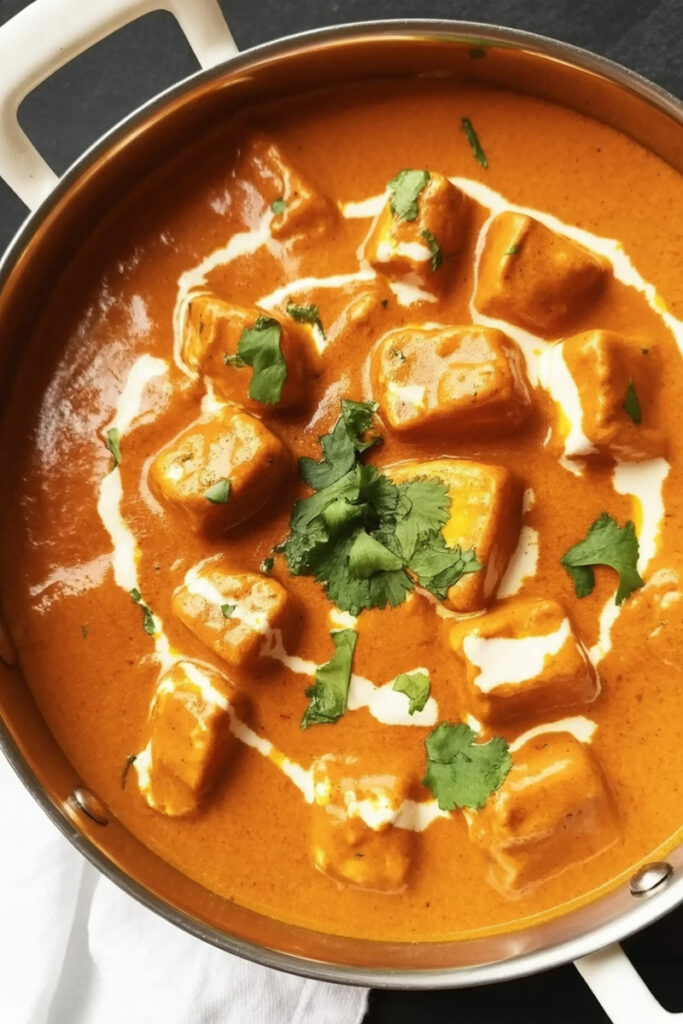
Let’s talk about a dish that’s pure comfort in a bowl. That creamy, bright orange, slightly sweet tomato gravy you get at your favorite Indian restaurant? That’s Paneer Butter Masala. It’s the kind of dish that makes you close your eyes for a second when you take the first bite.
I still remember the first time I really had it. I thought, “There’s no way I could ever make something this good at home.” It just seemed too magical.
Turns out, it’s not magic at all. The story goes that it was created back in the 1950s in Delhi. Chefs who had perfected the famous Butter Chicken wanted a vegetarian version of that amazing “Makhani” (buttery) gravy. So, they swapped the chicken for soft cubes of paneer. And boom. A legend was born.
The recipe I’m sharing today isn’t some super-complicated, chef-level secret. It’s the result of trying a bunch of different techniques and finding the perfect balance. We’re going to get those deep, authentic flavors and that signature silky gravy without all the fuss.
Get ready to make a Paneer Butter Masala so good, your family will be asking for the recipe.
What to Expect
Before we dive in, let’s get a quick look at what we’re getting into. It feels like a fancy weekend meal, but honestly, it comes together pretty fast.
- Prep Time: 15 minutes
- Cook Time: 30 minutes
- Total Time: About 45 minutes
This recipe makes enough for about 4 people. The gravy is rich, so you don’t need a huge portion!
Need to feed a crowd? No sweat. This recipe is easy to double or even triple. Just keep the ratios the same.
| Servings | Paneer (cubed) | Tomatoes (chopped) | Onions (sliced) | Cashews | Water (for blending) |
| 4 (This Recipe) | 250g | 4 large (~400g) | 1 large (~125g) | 1/4 cup (15) | 1 cup |
| 8 | 500g | 8 large (~800g) | 2 large (~250g) | 1/2 cup (30) | 2 cups |
| 2 | 125g | 2 large (~200g) | 1/2 large (~60g) | 2 tbsp (8) | 1/2 cup |
Difficulty Level: I’d call this an easy recipe, but with one key step that makes it look super fancy. That step is straining the gravy. It sounds like a pain, but it’s the one thing that gives you that incredibly smooth, restaurant texture. Don’t worry, I’ll walk you through it!
Essential Gear: You probably have all this stuff already.
- A heavy-bottomed pan: Helps cook everything evenly without burning.
- A good blender: This is how we get that creamy gravy. A high-speed one is great, but your regular blender will work just fine.
- A fine-mesh strainer: This is the non-negotiable tool for that silky-smooth finish. Seriously, don’t skip this!
- Spatula, spoons, the usual kitchen stuff.
Want to get a head start? You totally can. Make the gravy base (everything up to blending and straining) a couple of days ahead. Just keep it in an airtight container in the fridge. When you’re ready to eat, heat it, add the paneer and cream, and dinner is on the table in less than 10 minutes.
The Ingredients: What Makes the Magic Happen
The real secret here is using good ingredients and knowing what they do. Let’s break it down.
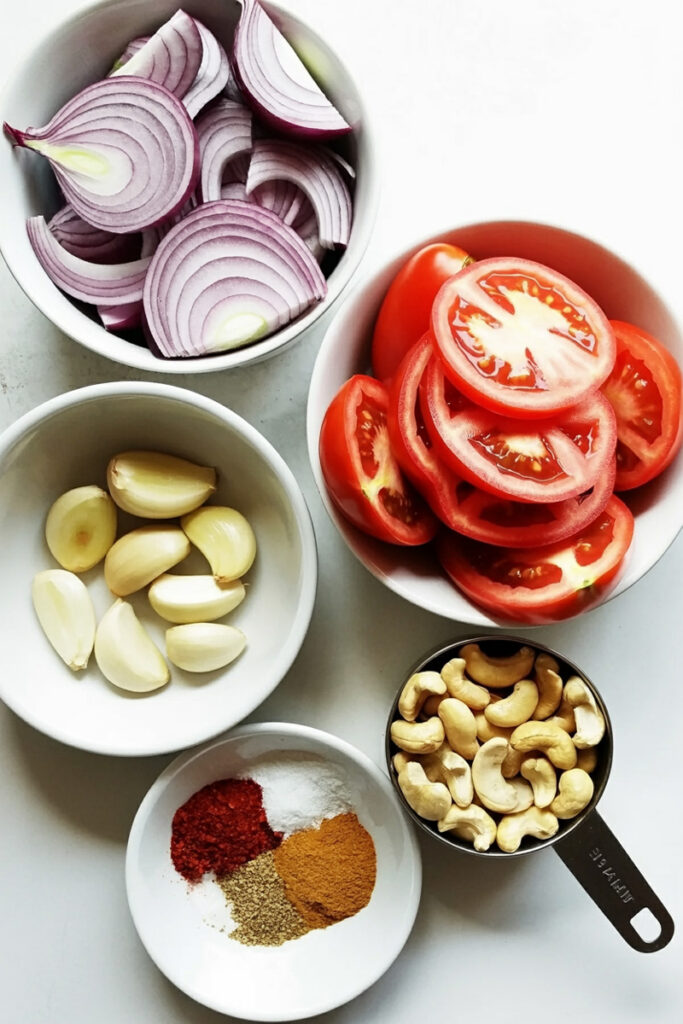
For the Gravy Base:
- Tomatoes: Use the reddest, ripest tomatoes you can find. They give the dish its color and natural sweetness. Trust me on this one, I once tried to make this with pale, sad-looking tomatoes, and the result was… well, let’s just say it wasn’t the same.
- Onions, Ginger & Garlic: The classic flavor foundation for so many amazing curries.
- Cashews: This is our secret weapon for creaminess! They break down and give the gravy an incredible richness and body. If you have a nut allergy, you can use blanched almonds or even sunflower seeds.1
- Spices: Think of the spices like a band. Each one plays a part.
- Green Cardamoms: Add a lovely, subtle floral scent right at the start.
- Kashmiri Red Chili Powder: This is a must. It gives that vibrant red-orange color without making the dish super spicy.
- Garam Masala & Coriander Powder: These bring the warmth and deep, earthy flavors.
- Jaggery or Sugar: Just a little bit! It’s not to make it sweet, but to balance the tanginess from the tomatoes. It’s a game-changer.
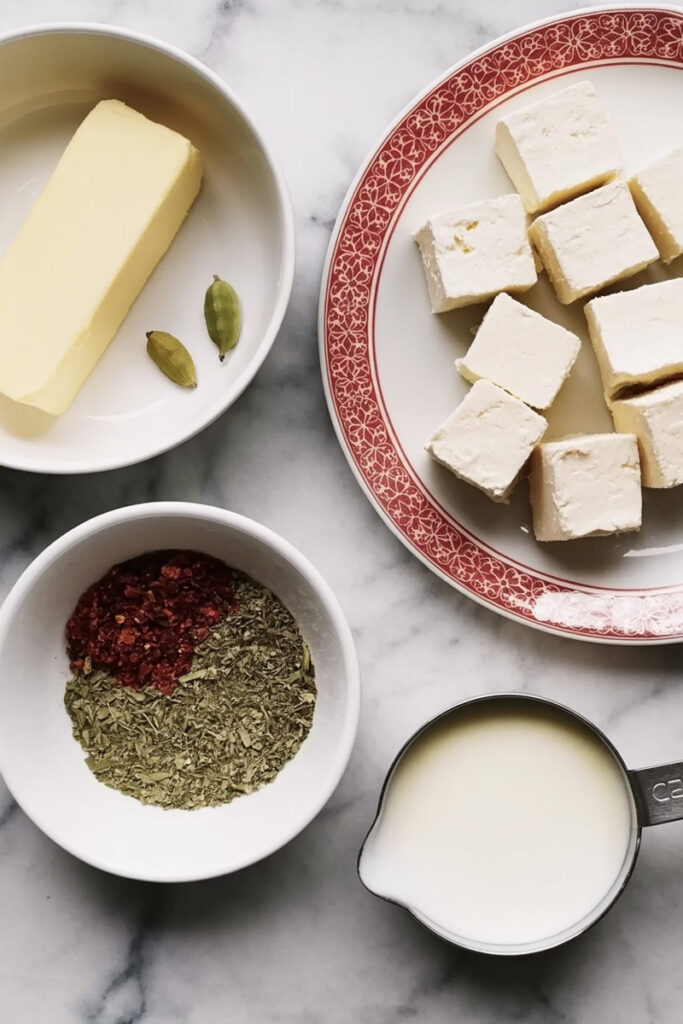
For Finishing the Dish:
- Butter: It’s in the name! Unsalted is best so you can control the salt level.
- Paneer: The star of the show. Get a good quality, fresh block of paneer and cut it into bite-sized cubes.
- Kasuri Methi (Dried Fenugreek Leaves): This is the ingredient that makes people say, “Wow, this tastes just like the restaurant!” You crush it between your hands before adding it, which releases its amazing aroma.2
- Heavy Cream: Adds that final touch of luxury and makes the gravy extra velvety.
Let’s Cook Together!
Alright, apron on? Let’s do this. I’ll guide you through every step.
Part 1: Building That Velvety Gravy
First, we create the flavor base. It’s all about slowly building up layers of taste.
- Sauté the Aromatics: Heat the oil in your pan over medium heat. Toss in the green cardamoms and let them sizzle for about 30 seconds until you can smell them. Then, add the sliced onions, ginger, and garlic. Cook for 4-5 minutes, stirring often. You’re just looking to soften them up, get them all sweet and glassy. No brown bits allowed!
- Cook the Tomatoes & Cashews: Add the chopped tomatoes, cashews, and salt. The salt helps the tomatoes release their juice. Give it a good stir, cover the pan, and let it cook for about 7 minutes. You’ll know it’s ready when the tomatoes are totally soft and mushy. If things look a little dry, just add a splash of water.
- Bloom the Spices: Now for the real flavor bomb. Stir in the Kashmiri red chili powder, coriander powder, and garam masala. Cook for another 3-4 minutes. This step toasts the spices and gets rid of any raw taste. Your kitchen should smell absolutely incredible right now. Turn off the heat and let the mixture cool down completely.
- Blend it Smooth: Quick safety tip I learned the hard way: Never blend hot stuff. It can build up steam and blow the lid off your blender. Once the mix is cool, pour your cup of cold water into the blender first (this helps it blend better), then add the cooled tomato mixture. Blend until it is ridiculously smooth. No lumps, no grit, just a perfect puree.

Part 2: Putting It All Together
The hard part is over. Now we turn that puree into our masterpiece.
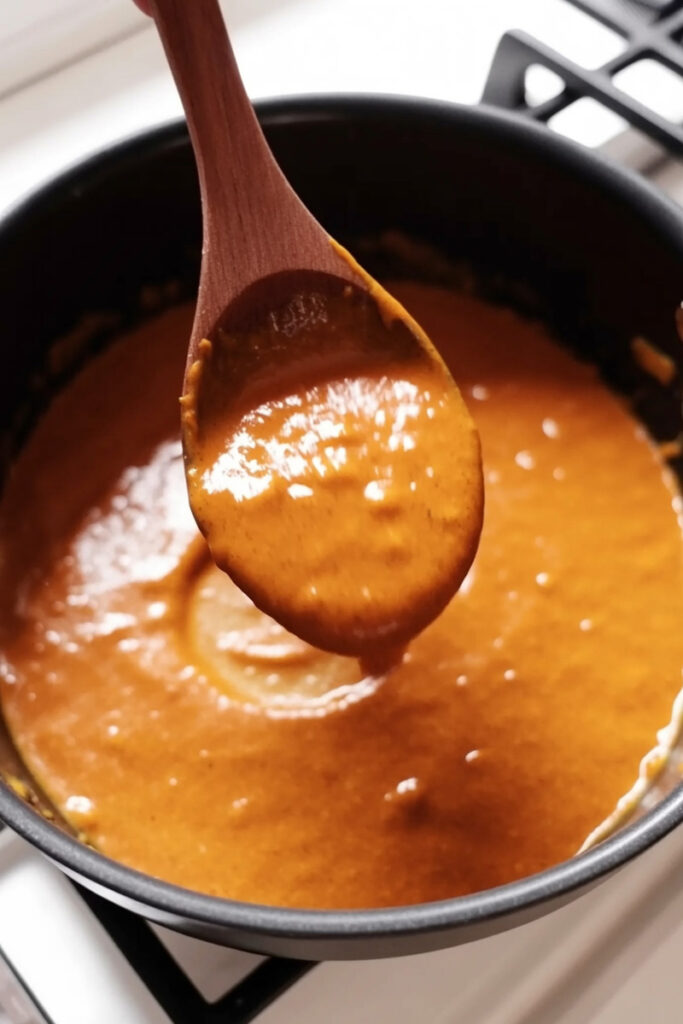
- The Second Sizzle & Strain: In the same pan (why make more dishes?), melt the butter over low heat. Now, for the most important step for that restaurant finish: Hold your fine-mesh strainer over the pan and pour the blended gravy through it. Use a spoon or spatula to push all the liquid through, leaving behind any tiny seeds or skins. Yes, this step is a little extra work, but it is so worth it. It’s the difference between a good homemade curry and a great one.
- Simmer the Gravy: Stir the strained gravy in the pan. Add another ½ cup of water to get it to the right consistency. Cover it up and let it simmer on medium for 10-12 minutes. Give it a stir every so often. You’ll know it’s done when the gravy has thickened up a bit and you see little specks of butter glistening on the surface.
- The Finishing Touches: Time to bring it home. Give the gravy a taste. Does it need a little more salt? A pinch more garam masala? Now’s the time to adjust. Stir in the jaggery/sugar and the crushed Kasuri Methi. Gently add your paneer cubes.
- Final Steps: Cover the pan and cook on low for just 2-3 more minutes. We just want to warm the paneer through, not make it tough. Finally, turn off the heat completely and stir in the heavy cream. That’s it. You did it!

Want to Mix It Up? Go for It!
This recipe is a fantastic starting point, but feel free to make it your own.
- Make it Vegan: Super easy!
- Use oil or vegan butter instead of dairy butter.
- Swap the heavy cream for full-fat coconut cream or cashew cream.
- Use firm tofu (pan-fry it first!) or even chickpeas instead of paneer.
- Kick up the Heat: This version is pretty mild. If you like it spicy, add a slit green chili when you sauté the onions, or just use a bit more red chili powder.
- Get Fancy with Smoke: Want that smoky, tandoori-like flavor? Try the “Dhungar” method. Place a tiny steel bowl in the center of your finished curry. Put a piece of red-hot charcoal in the bowl, pour a drop of ghee or oil on it, and immediately cover the pot for a minute. The smoke will infuse the whole dish. It’s an amazing trick!
Time to Eat! (And How to Save the Leftovers)
Your amazing Paneer Butter Masala is ready! Pour it into a nice bowl, maybe drizzle a little extra cream on top, and sprinkle with some fresh coriander.
This gravy was made for mopping up with warm, fluffy naan bread. Butter naan or garlic naan are perfect partners. It’s also fantastic over a simple bowl of basmati rice or jeera (cumin) rice.

Got leftovers? First of all, lucky you! The flavors actually get even better the next day.
- Fridge: Let it cool completely, then store it in an airtight container for up to 4 days.
- Reheating: Warm it up gently in a pan on the stove. The gravy will thicken in the fridge, so add a splash of water or milk to loosen it up. I’d avoid the microwave; it can make the paneer rubbery.
- Freezer: You can freeze the gravy before adding the paneer and cream.3 It keeps well for up to 2 months. Just thaw, reheat, and then add the fresh paneer and cream.
Paneer Butter Masala

Create that amazing, creamy, restaurant-quality Paneer Butter Masala right in your own kitchen! This recipe delivers a silky, vibrant tomato gravy with soft paneer cubes—pure comfort food that’s surprisingly easy to make.
- Prep Time: 15 minutes
- Cook Time: 30 minutes
- Total Time: 45 minutes
- Yield: 4 people 1x
- Category: Main Course, Curry
- Cuisine: North Indian
Ingredients
For the Gravy Base:
- 1 tbsp Oil (neutral, like canola)
- 2 Green Cardamoms
- 1 large Onion, sliced (~125g)
- 1-inch piece Ginger, roughly chopped
- 3–4 cloves Garlic, roughly chopped
- 4 large ripe Tomatoes, chopped (~400g)
- ¼ cup whole Cashews (about 15)
- 1 tsp Salt, or to taste
- 1 ½ tsp Kashmiri Red Chili Powder
- ½ tsp Coriander Powder
- ½ tsp Garam Masala
- 1 cup Water (for blending)
For Finishing the Curry:
- 1 tbsp Unsalted Butter
- ½ cup Water, or as needed for consistency
- 1 tsp Jaggery or Sugar
- 1 tbsp Kasuri Methi (dried fenugreek leaves)
- 250g Paneer, cut into ¾-inch cubes
- 3 tbsp Heavy Cream
- Fresh Coriander, chopped (for garnish)
Instructions
- Sauté Aromatics: Heat oil in a pan over medium heat. Add cardamom and let it sizzle for 30 seconds. Add onions, ginger, and garlic, and sauté until soft and translucent (about 5 mins).
- Cook Tomatoes: Stir in chopped tomatoes, cashews, and salt. Cover and cook for 7-8 minutes until the tomatoes are completely mushy.
- Add Spices: Stir in the Kashmiri chili powder, coriander powder, and garam masala. Cook for another 2-3 minutes until fragrant. Turn off the heat and let the mixture cool down completely.
- Blend Smooth: Transfer the cooled mixture to a blender with 1 cup of water. Blend until it’s perfectly smooth and vibrant.
- Strain the Gravy: Melt the butter in the same pan over low heat. Pour the blended puree through a fine-mesh strainer directly into the pan, using a spoon to push it all through. Discard any solids left behind. This is the secret to a silky texture!
- Simmer: Stir in ½ cup of water to reach your desired consistency. Bring to a gentle simmer, then cover and cook on low for 10-12 minutes. The gravy will thicken and you’ll see a lovely sheen of butter on the surface.
- Finish: Stir in the jaggery or sugar. Crush the Kasuri Methi between your palms to release its aroma and add it to the gravy. Gently fold in the paneer cubes and simmer for just 2 more minutes to warm them through.
- Add Cream: Turn off the heat completely and stir in the heavy cream. Garnish with fresh coriander and serve hot.
Notes
- Serving Suggestions: This curry is perfect with warm Butter Naan, Garlic Naan, or fluffy Basmati rice to soak up every last drop of the delicious gravy.
- Tips & Tricks:
- Use Ripe Tomatoes: This is the key to getting that beautiful color and a balanced, sweet flavor.
- Don’t Skip Straining! This single step is what gives the curry its signature, ultra-smooth restaurant feel. It’s worth the tiny bit of extra effort.
- Don’t Overcook the Paneer: Just warm it through at the very end. Overcooking can make it tough and rubbery.
- Storage & Reheating:
- Store: Leftovers taste even better the next day! Keep in an airtight container in the fridge for up to 4 days.
- Reheat: Gently warm in a pan on the stovetop. The gravy will have thickened, so add a splash of water or milk to loosen it back up. Avoid using a microwave if possible.